
Hi and welcome back to the MQTT series, where we’ll go from the protocol basics, to real-world implementations of different use cases, using different brokers and clients. In this article we’ll see how to setup secure a Mosquitto MQTT Broker with TLS and Access Control.
In the previous article we’ve covered the protocol basics, saw how it compares to HTTP and why it is so relevant for IoT.
Today we’ll explore one of most used brokers: Eclispe Mosquitto. We’ll discuss the role of a broker in a MQTT-based architecture and while covering some advantages and disadvantages of Mosquitto, which should help you understand if this is the suitable broker for your use case.
We’ll also see how to run Mosquitto in a secure way, using SSL/TLS and User Access Control, and we’ll see how the Mosquitto command line tools can be used to publish and subscribe to data.
The MQTT Broker – what is it and what does it do?
An MQTT broker acts as the intermediary between the different intervenients in a system. These invervenients (referred to as clients), can assume the role of data publishers, data subscribers, or both.
The MQTT broker is, therefore, a central piece of an MQTT-based architecture.
It can handle client authentication and authorization, and holds the data not yet delivered to clients (being persisted sessions – covered in more detail in a future article, or last will and testament or retained messages). It’s also the responsible for message relaying and routing, from publishers to subscribers.
Being a protocol aimed for lightweight and computing and powered-limited devices, most of the session management is done by the broker – which relieve clients, running in this limited devices, from additional workloads.
This differs from other messaging protocols and technologies (e.g. Kafka), where clients will need to poll for new messages, leaving the broker free to deal with other tasks. A more detailed article, comparing MQTT to Kafka and other protocols will be added later to this series, showcasing a few of the core differences between the different approaches, and showing where each one may be more suited.
We can, therefore, conclude that the despite clients and the broker sharing responsibilities in a MQTT-based architecture, the broker owns quite a few more tasks. Depending on a few architectural choices, it can even become a single point of failure.
Eclipse Mosquitto – What is it?
Eclipse Mosquitto, often referred to as Mosquitto, is an open-source MQTT broker that implements the MQTT versions 5.0 and 3.1.1.
It’s selling point is its lightweightness, making it suitable for use on all compatible devices, from low-power single-board computers to full servers.
The Mosquitto project also provides a C library for implementing MQTT clients, and the very popular mosquitto_pub and mosquitto_sub command-line MQTT clients which we’ll see in action later in this article.
Mosquitto is part of the Eclipse Foundation, is open source and free to use.
Although it is massively used, Mosquitto may not be the MQTT broker your use case needs. Before we get “our hands dirty”, let’s see some of its core advantages and disadvantages.
Advantages
It’s Lightweight
One of the key features (perhaps the biggest selling point) of Mosquitto is its lightweight design. This means it requires minimal system resources to run, making it ideal for small, resource-constrained devices like sensors, micro-controllers, and other IoT devices.
It’s Multi-Platform
Mosquitto can run on various operating systems, including Linux, Windows, macOS, and even on embedded systems like Raspberry Pi. We’ll use docker in this article to run Mosquitto, which is itself supported in many platforms.
Its supports Bridge Connections
Bridge connections allow Mosquitto brokers to connect with other MQTT brokers, either from the same or different networks. MQTT bridges are especially helpful for use cases where connectivity is not always ensured and data loss is not tolerated. Bridges deserve their own article, due to their importance and complexity.
It can store messages
Mosquitto provides a message storage feature (both in memory or using a disk-based storage). This means that it can store messages that it receives when the intended recipients are not currently connected.
It’s free and Open Source
Mosquitto is free to use and it’s open source, although commercial offerings are available though Cedalo.
Limitations
It has limited Scalability
This is, perhaps the most striking limitation. With MQTT being a central part of the architecture, it is both a single point of failure, and a potential bottleneck.
Although a single Mosquitto instance can support up to thousands of connections and clients, which may be suitable for smaller to medium scale IoT deployments, it cannot scale up to millions of connections required for large scale deployments.
With the inability to be deployed in a cluster-topology (not natively at least in the free version), it is also not possible to have highly available Mosquitto deployments, which can limit the overall system availability.
Limited feature set
Some features that other brokers (mostly commercial offerings) provide are not present in Mosquitto. Features such as Web API for management, Observability, protocol-adapter bridges. While this may not be a dealbreaker for many use cases, it can be problematic for those where reliability ans scalability are paramount.
Note: The Mosquitto Pro Edition/ Cedalo does offer High Availability, alongside a few other interesting tools, such as Kafka and MongoDB bridges, Observability, etc. Cedalo is not free to use.
Simple Setup with Docker
Note: This article assumes docker is already installed. Docker is not mandatory, and Mosquitto can be installed directly on Windows, Linux, MacOs …
The following command starts a new container using the eclispe-mosquitto image, named my-mosquitto-instance. This container will run as a deamon (thanks to the -d flag) and will expose ports 1883 and 8883.
The simplest way to start a Mosquitto instance using docker is to run the following command:
docker run -d -p 1883:1883 -p 8883:8883--name my-mosquitto-instance eclipse-mosquittoOnce this command finishes, you’ll have a running mosquitto instance, which you can verify by running the docker stats command.

As it’s possible to see, even though it is not processing any messages, it’s idle CPU (0,03%) and memory (728KiB) footprint are very low.
We are not going to use this instance, as before we use it, we want to configure a few behaviors, and more importantly, security.
As such, we are going to stop and then remove the container.
docker stop my-mosquitto-instance
docker rm my-mosquitto-instance
Important Configurations
Mosquitto is configured using the mosquitto.conf configuration file. This is where all non-default configurations are defined.
The exhaustive list of possible configurations is available here. In this article we’ll cover a few of the most relevant ones, but depending on the use case, the remaining ones may be relevant as well.
Authentication
Authentication is handled using a password file. This file can be created with the mosquitto_pwd command.
Note the -c flag will recreate the file if it already exists, erasing existing usernames and passwords.
mosquitto_passwd -c <password file> <username>It’s possible to add a username with a password (watch out for command line history for password leaks!!!) to an existing password file using:
mosquitto_passwd <password file> <username> <password>
To let Mosquitto known about this password file, the mosquitto.conf needs to have an entry pointing to it:
password_file /path/to/passwordfile
It’s also possible to allow unauthenticated/anonymous access. This option may be good enough for closed networks, or to expose some topics freely. To do so, add the following entry:
allow_anonymous true
Authorization and permissions
Now that we know how to authenticate our clients, we need to define to which topics they have access to and in which manner. This is defined in a ACL (Access Control List) file. To do so, add the acl_file parameter to the configuration file:
acl_file /path/to/acl_file Access to a topic or topic pattern can be of the following types:
readwritereadwritedeny
Note that access to a topic is denied by default, but it may be required to explicitly deny access to a topic otherwise granted by a preceding rule.
An example of such configuration to allow read on a topic named temperature would be
topic read /temperature
or to grant read/write access to a pattern, the syntax would be
pattern readwrite /temperature/%c/devices
Patterns allow the usage of %c – standing for client id and %u – representing the username
If no user is defined above the ACL line, it is applied to all anonymous users. To grant access to a specific user, the topic or pattern permissions shall be preceded by a user definition.
For instance, to grant read access to topics temperature and humidity for user temperature_processor, the following would be required:
user temperature_processor
topic read temperature
user temperature_processor
topic read humidity
Note that changing the ACL file requires a mosquitto restart.
Message order
Message reception order may be a constraint for some use cases. While for some use cases it’s not relevant that messages are received in the same order as they were sent, it may be paramount for some systems.
Notice that QoS1 and 2 messages may be in flight, waiting for the completion of the handshake while new messages are being sent, which can affect the order of reception.
By default, Mosquitto limits this to 20 messages. This limit can be disabled by setting the max_inflight_messages configuration to 0.
Setting it to 1 will ensure message order delivery, at the expense of throughput. It’s also possible to limit the amount of information in-flight, using the max_inflight_bytes, which is set to 0 (no limit), by default.
If a QoS1 or 2 message cannot be delivered to its consumer, it will be held (or queued), globally, by the broker until the one of the following happens:
- the maximum queued bytes exceeds the max_queued_bytes parameter-
- the number of queued messages exceeds the max_queued_messages
Note: client-specific retention can be applied, as each client cans set its session expiry duration.
Retained messages, which deserve an article of its own, are enabled by default.
They can be disabled by setting the retain_available flag to false.
Persistence
By default, Mosquitto will keep all queued data in memory. This sensible default prioritizes throughput over resiliency, but in the event of a service restart, all data which has not yet been sent, will be lost.
Mosquitto can be configured to store all data to a persistent storage, by setting the persistence flag to true.
When doing so, a custom path to store the data can be set, using the persistence_file and persistence_location configurations.
Note: deciding to enable persistence will result in a penalty in resource usage and throughput. Usage of persistence setting shall be carefully considered.
QoS
It is possible to define the maximum Quality of Service Level. By default QoS2 is available, but in some use cases, it may be required to centrally downgrade to QoS1 or 0. This can be done by setting the max_qos flag.
SSL/TLS
By default, Mosquitto uses plain MQTT. This means that over insecure networks such as the internet, information can be intercepted and read. Mosquitto supports SSL/TLS (often referred to as MQTTS).
To enable TLS, 3 files are required and shall be configured in the configuration file
cafile – pointing to the certificate authority file
capath – directory which contains the PEM encoded CA files
certfile – Encoded server certificate file in PEM format
A practical example of how to generate and setup SSL is shown just after this section of this article.
Notice that enabling SSL/TLS carries a performance penalty, as data needs to be encrypted and decrypted using the provider certificated.
Bridges
Bridges although simple in their concept – a broker relays messages to another broker- are quite nuanced and can have complex behaviors, which we will not cover in this article. It’s relevant, though, to mention, that bridges are defined in this configuration file, for Mosquitto.
There will be a dedicated topic to MQTT bridges and their use cases.
Setup Mosquitto with Docker Compose, SSL, Authentication and ACL
Before jumping into the setup of our Mosquitto withdocker compose, it’s necessary to obtain the SSL certificates. For the sake of this example we’ll use self-signed certificates.
Note: Self-signed certificates are not recommended for production usage. Using certificates issued by a trusted certificate authority (CA) is usually a good idea.
To generate the self-signed certificate we’ll use openssl, so make sure you have that available in your command line prompt.
1 – Since we don’t have a certificate authority, we’ll create a local CA using SSL:
mkdir certs
cd certs
openssl genrsa -des3 -out ca.key 2048
enter a pass phrase with at least 4 characters. Remember it as it will be used several times.
2 – Then we’ll create a signing request for our local CA
openssl req -new -key ca.key -out ca.csr -sha256
Enter the same passphrase chosen in the previous step. It’s safe to leave all other fields empty, for the sake of our setup’s simplicity.
3 – Then we can create our CA root certificate, valid for 180 days:
openssl x509 -req -in ca.csr -signkey ca.key -out ca-root.crt -days 180 -sha256
Again, enter the preciously chosen passphrase when requested to do so.
4 – We’ll then create our Mosquitto certificate key
openssl genrsa -out mosquitto.key 2048
5 – And using the key, we’ll create a certificate request:
openssl req -new -key mosquitto.key -out mosquitto.csr -sha256
Note: when being prompted for the “Common Name”, use “localhost”, as this will be the way we’ll reference the MQTT broker locally. If you have a DNS entry pointing to the host server, you can use that too. All remaining fields can be left empty.
6 – Lastly, we’ll create the certificate, using the certificate request created in step 5 and the CA root certificate created in step 5, also valid for 180 days
openssl x509 -req -in mosquitto.csr -CA ca-root.crt -CAkey ca.key -CAcreateserial -out mosquitto.crt -days 180
When you’re done you should have the following files in the certs directory:
- ca-root.crt – Certificate authority root certificate
- ca.csr – Certificate authority certificate signing request
- ca.key – Certificate Authority certificate Key
- mosquitto.crt – Mosquitto certificate
- mosquitto.csr – Mosquitto certificate signing request
- mosquitto.key – Mosquitto certificate key
Not all these files are required for Mosquitto to run, or for messages to be sent and received using SSL, but they are required at some point of this process to generated the needed files.
All these files can be found in GitHub for simplicity.
The next step is the creation of a docker-compose file. In there, we’ll create a service based on the Mosquitto docker image. We’ll create a few mounted volumes as well:
- certificates folder – so they can be read by the container
- persistence – so persisted data can survive container restarts
- mosquitto.conf – so the configuration file can be changed outside the container
- password_file – so that it can be inspected from the outside, and backed up, if needed
- acl_file – so that it can be inspected from the outside, and backed up, if needed
Note: You may get a warning when you first start the container, stating that both the password file and the acl file need to have 0700 permissions (so that they are not readable by other users).
To fix that run the following
sudo chmod 0700 config/acl_file
sudo chmod 0700 config/password_file
Here’s what the docker-compose.yml file looks like:
version: '3'
services:
  mosquitto:
    container_name: mosquitto
    image: eclipse-mosquitto:latest
    volumes:
      - ./config/mosquitto.conf:/mosquitto/config/mosquitto.conf:ro
      - ./config/acl_file:/mosquitto/config/acl_file:ro
      - ./config/password_file:/mosquitto/config/password_file:rw
      - ./certs:/mosquitto/config/certs
    ports:
      - 1883:1883
      - 8883:8883
Before we start the container, let’s have a look at the mosquitto.conf, which should be inside a config folder:
per_listener_settings true
listener 8883 0.0.0.0
protocol mqtt

#SSL
cafile /mosquitto/config/certs/ca-root.crt
certfile /mosquitto/config/certs/mosquitto.crt
keyfile /mosquitto/config/certs/mosquitto.key

#ACL
acl_file /mosquitto/config/acl_file
allow_anonymous true

#Access Control
password_file /mosquitto/config/password_file
The configuration file is quite simple:
- It specifics the port and protocol
- It allows anonymous access (we may want certain topics to be kept accessible y non-authenticated users).
- It specifies the location of the relevant mounted server certificate, certificate key and CA root certificate.
- It points to the ACL file (which we’ll see below)
- It points to the password file (which is empty by default).
ACL File:
#anonymous access
topic readwrite /health_status


#user based access

user temperature_sensor
topic write /temperature

user temperature_controller
topic read  /temperature

user read_all
topic read /#
In this ACL, the user temperature_sensor can write to the /temperature topic, user temperature_controller can read from the same topic, and user read_all can read from all topics.
The ACL also allows anonymous read/write access to a topic called health_status.
Before we can setup our user passwords, we may now start the container:
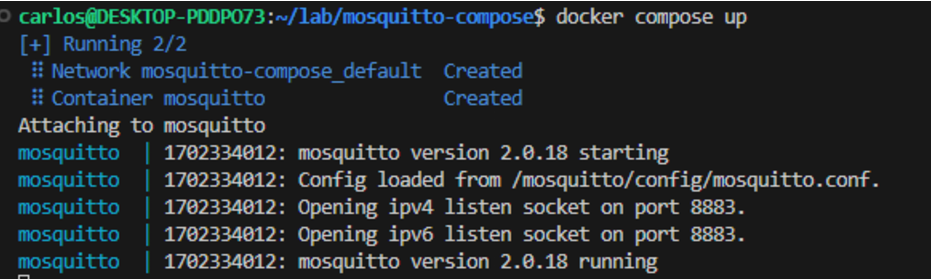
docker compose upNote: Add the -d flag if you want to run in detached mode.
Keep an eye on the logs for any errors. (run docker compose logs -f you are running in detached mode, to see the logs)
If all went well you should see something similar to:
Since the container is up and running, we can now, in a separate command line instance, create our 3 users:
First we’ll create the temperature_sensor with the SecureSecret password
docker exec mosquitto mosquitto_passwd -b /mosquitto/config/password_file temperature_sensor SecureSecretThen then add the temperature_controller user with the AnotherSecureSecret Password
docker exec mosquitto mosquitto_passwd -b /mosquitto/config/password_file temperature_controller AnotherSecureSecretWe’ll finally create a user which will be able to read all topics:
docker exec mosquitto mosquitto_passwd -b /mosquitto/config/password_file read_all SecretOnce done, you can inspect the password file. Note you may need to use sudo, due to the restricted permissions assigned earlier.
cat config/password_file

Note the encrypted passwords next to to each username.
We’re now ready to publish messages and subscribe to topics and play with our credentials.
Publishing and receiving messages with the Mosquito command line tools
To publish messages we’ll be using the Mosquitto client tools, so go ahead and ensure they are installed in your environment.
According to our ACL file, the topic health_status is anonymously writable and readable.
Let’s try to publish a message using the mosquitto_pub utility, without specifying any user:
mosquitto_pub -h localhost -p 8883 -t health_status -m "I am healthy" --cafile certs/ca-root.crt --key certs/mosquitto.key --cert certs/mosquitto.crt -d
Breaking down the parameters:
- -h specifies the hostname of the MQTT server (localhost in this case)
- -p specifics the server port
- -t speficies the topic
- -m specifies the message to be sent
- –cafile specifies the CA root certificate
- –key specifies the certificate key
- — cert specifies the certificates
- -q specifies the quality of service
- -d enables debug mode, which shows the protocol-level messages
We can now subscribe to the same topic, using mosquitto_sub:
mosquitto_sub -p 8883 --cafile certs/ca-root.crt --key certs/mosquitto.key --cert certs/mosquitto.crt -d -q 2 -t /health_statusIf we publish again the same message with mosquitto_pub, using the previous command, we’re able to see the message being received by the publisher.

Note: When trying to subscribe or publish to an unauthorized topic, there is no visible error, but messages won’t be sent or consumed.
Let’s now use our usernames and passwords to first try something illegal, considering our ACL. We’ll first start consuming from all topics, using our read_all user, so we can monitor what is actually published:
mosquitto_sub -h localhost -p 8883 --cafile certs/ca-root.crt --key certs/mosquitto.key --cert certs/mosquitto.crt -d -u read_all -P Secret -t /#In a separate shell, with our temperature_sensor user, capable only of writing to the topic /temperature we’ll try to write to the /humidity.
Nothing is received by our read_all user since the temperature_sensor cannot write to this topic. Our ACL is working as intended.
We’ll now try to publish to a topic that the user can write to, according to the ACL. We’ll publish to /temperature – since this is an allowed topic for write. When doing so, data is received by our read_all subscriber


And this is how the ACL works, and how to both use SSL and User authorization with Mosquitto.
Wrap-up
In this article we covered a lot. From the creation of self-signed certificates, to the instantiation of a TLS/SSL secure MQTT broker with Mosquitto, to managing user access control lists, while peeking into mosquito command line tools.
If these MQTT concepts discussed here are new, check out this MQTT protocol article for more information.
In the next article of this series we’ll start looking at some advances use cases with MQTT, such as persistent sessions and implementation of the worker pattern for workload distribution.
Further Reading:
- Configuration file: https://mosquitto.org/man/mosquitto-conf-5.html
- Mosquitto Authentication: https://mosquitto.org/documentation/authentication-methods/ Self signed certificates: https://en.wikipedia.org/wiki/Self-signed_certificate
- Open SSL: https://www.openssl.org/docs/manmaster/man1/
- Mosquitto Pub: https://mosquitto.org/man/mosquitto_pub-1.html
- Mosquitto Sub: https://mosquitto.org/man/mosquitto_sub-1.html
[…] Setting up a secure Mosquitto MQTT Broker with SSL/TLS and User Access Control– MQTT series #2 […]